Kubernetes
Learn how to deploy your Haystack pipelines through Kubernetes.
The best way to get Haystack running as a workload in a container orchestrator like Kubernetes is to create a service to expose one or more Hayhooks instances.
Create a Haystack Kubernetes Service using Hayhooks
As a first step, we recommend to create a local KinD or Minikube Kubernetes cluster. You can manage your cluster from CLI, but tools like k9s or Lens can ease the process.
When done, start with a very simple Kubernetes Service running a single Hayhooks Pod:
kind: Pod
apiVersion: v1
metadata:
  name: hayhooks
  labels:
    app: haystack
spec:
  containers:
    - image: deepset/hayhooks:v0.6.0
      name: hayhooks
      imagePullPolicy: IfNotPresent
      resources:
        limits:
          memory: "512Mi"
          cpu: "500m"
        requests:
          memory: "256Mi"
          cpu: "250m"

---

kind: Service
apiVersion: v1
metadata:
  name: haystack-service
spec:
  selector:
    app: haystack
  type: ClusterIP
  ports:
    # Default port used by the Hayhooks Docker image
    - port: 1416
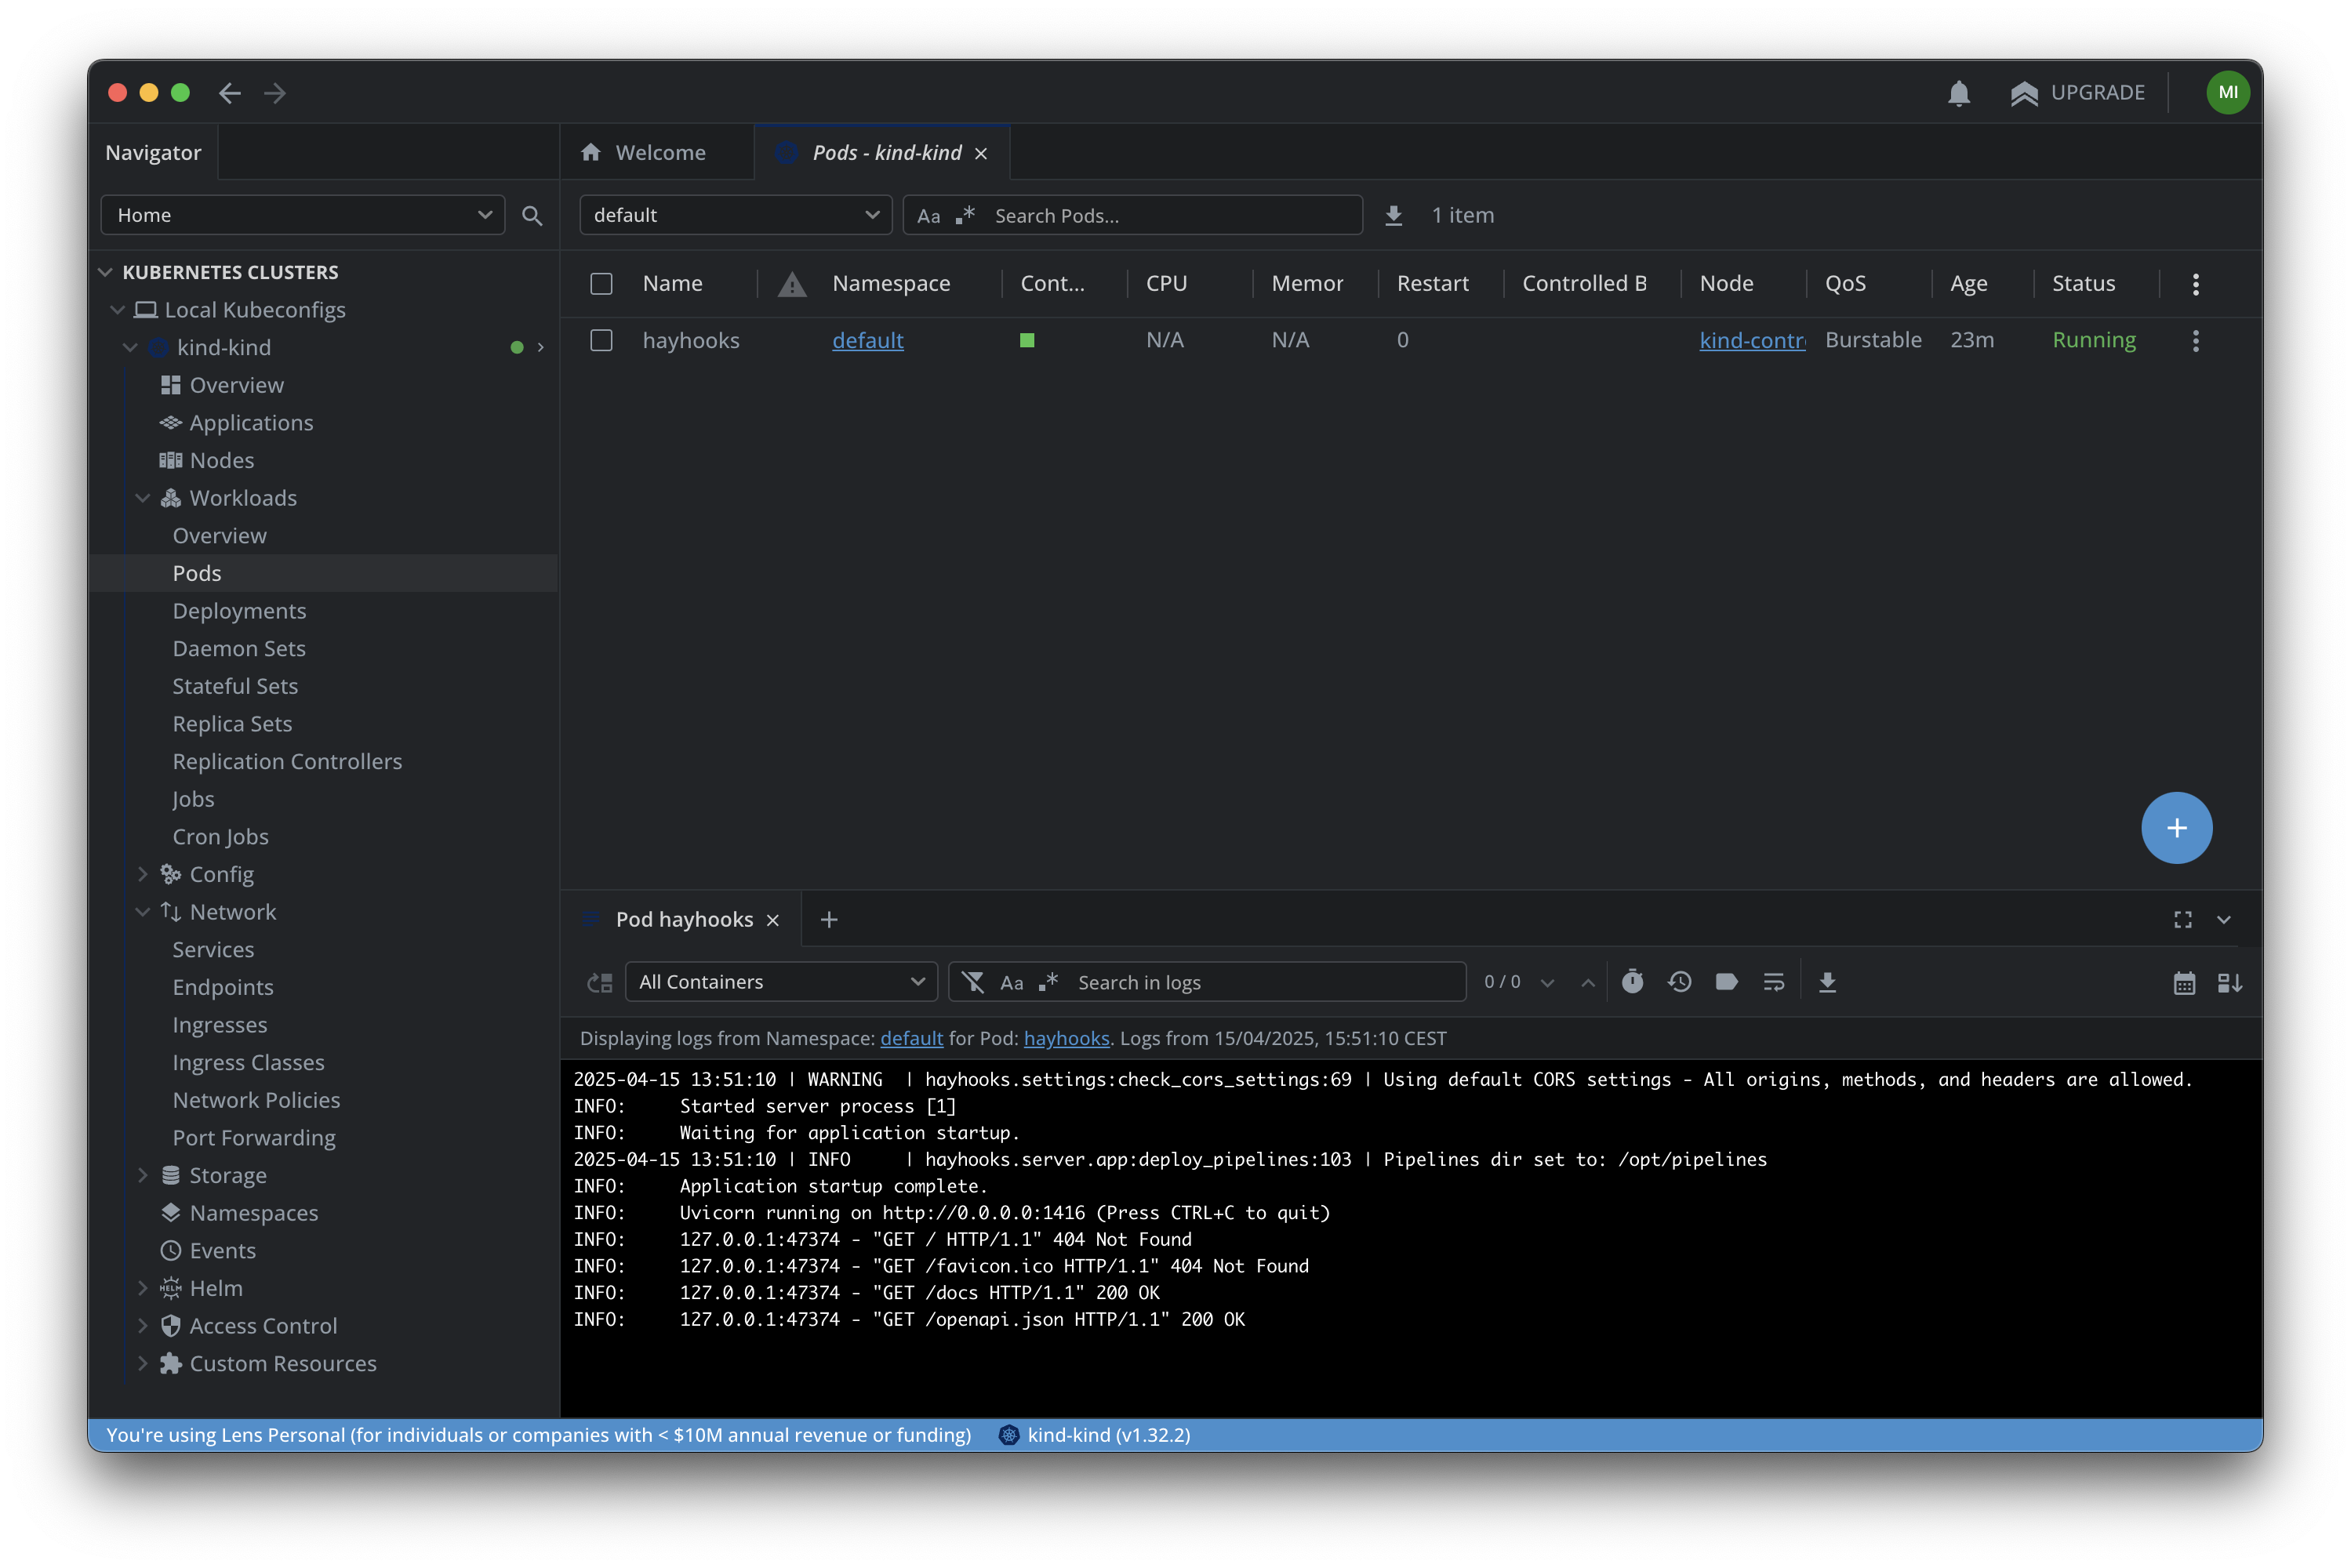
After applying the above to an existing Kubernetes cluster, a hayhooks Pod will show up as a Service called haystack-service.
Note that the Service defined above is of type ClusterIP. That means it's exposed only inside the Kubernetes cluster. To expose the Hayhooks API to the outside world as well, you need a NodePort or Ingress resource. As an alternative, it's also possible to use Port Forwarding to access the Service locally.
To do that, add port 30080 to Host-To-Node Mapping of our KinD cluster. In other words, make sure that the cluster is created with a node configuration similar to the following:
kind: Cluster
apiVersion: kind.x-k8s.io/v1alpha4
nodes:
  - role: control-plane
    # ...
    extraPortMappings:
      - containerPort: 30080
        hostPort: 30080
        protocol: TCP
Then, create a simple NodePort to test if Hayhooks Pod is running correctly:
apiVersion: v1
kind: Service
metadata:
  name: haystack-nodeport
spec:
  selector:
    app: haystack
  type: NodePort
  ports:
  - port: 1416
    targetPort: 1416
    nodePort: 30080
    name: http
After applying this, hayhooks Pod will be accessible on localhost:30080.
From here, you should be able to manage pipelines. Remember that it's possible to deploy multiple different pipelines on a single Hayhooks instance. Check the Hayhooks docs for more details.
Auto-Run Pipelines at Pod Start
Hayhooks can load Haystack pipelines at startup, making them readily available when the server starts. You can leverage this mechanism to have your pods immediately serve one or more pipelines when they start.
At startup, it will look for deployed pipelines on the path specified at HAYHOOKS_PIPELINES_DIR, then load them.
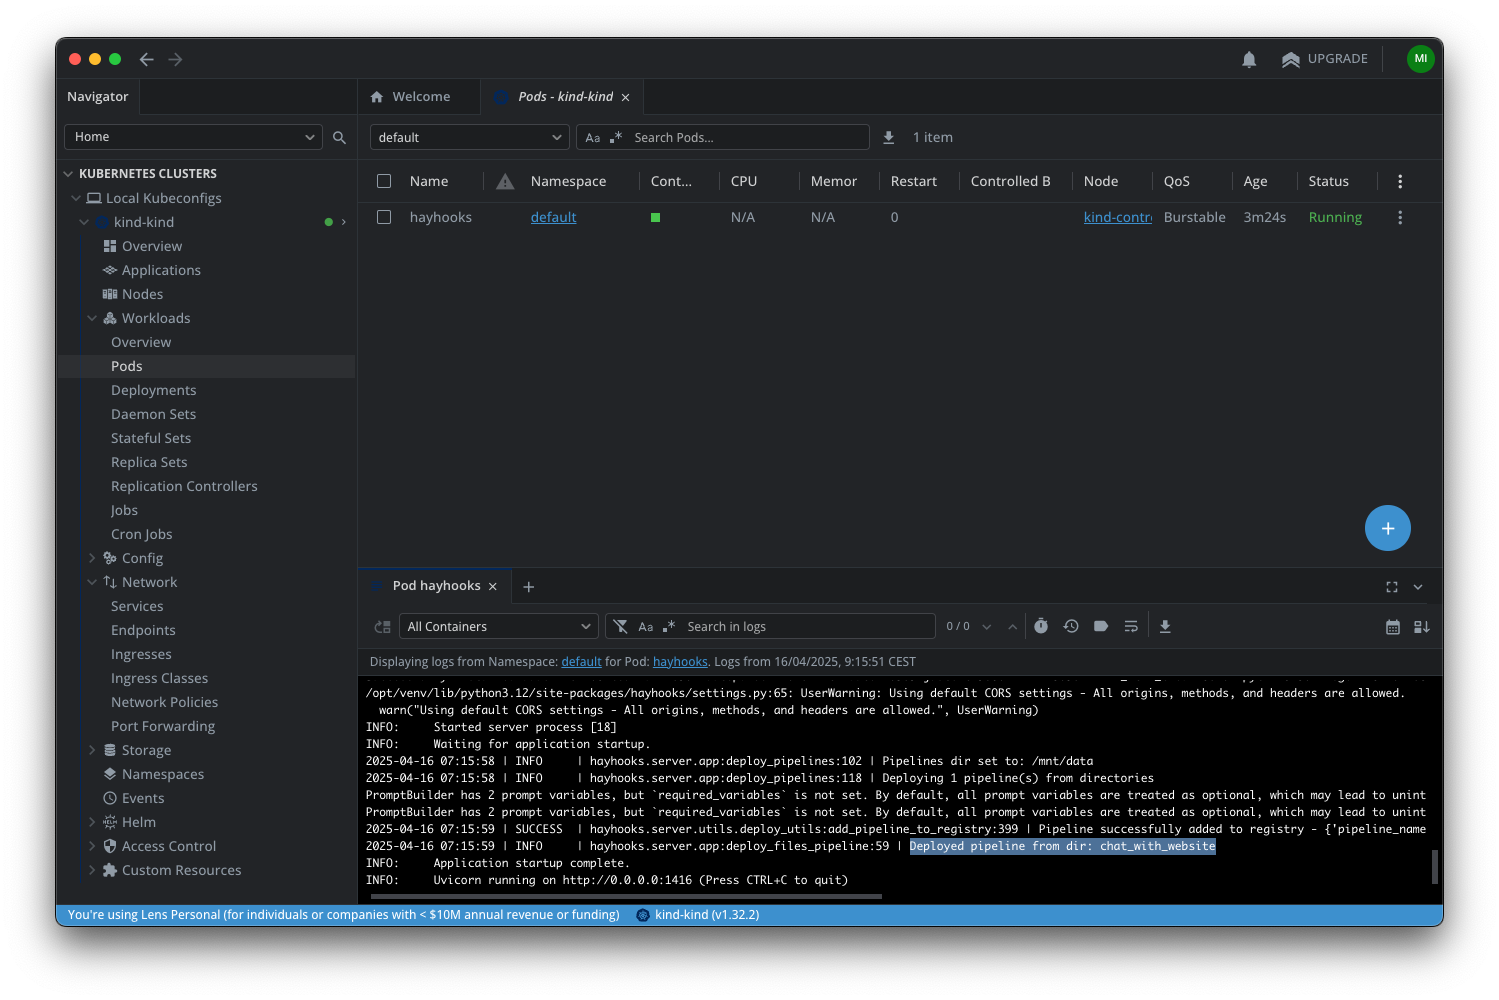
A deployed pipeline is essentially a directory which must contain a pipeline_wrapper.py file and possibly other files. To preload an example pipeline, you need to mount a local folder inside the cluster node, then make it available on Hayhooks Pod as well.
First, ensure that a local folder is mounted correctly on the KinD cluster node at /data:
kind: Cluster
apiVersion: kind.x-k8s.io/v1alpha4
nodes:
  - role: control-plane
    # ...
    extraMounts:
      - hostPath: /path/to/local/pipelines/folder
        containerPath: /data
Next, make /data available as a volume and mount it on Hayhooks Pod. To do that, update your previous Pod configuration to the following:
kind: Pod
apiVersion: v1
metadata:
  name: hayhooks
  labels:
    app: haystack
spec:
  containers:
    - image: deepset/hayhooks:v0.6.0
      name: hayhooks
      imagePullPolicy: IfNotPresent
      command: ["/bin/sh", "-c"]
      args:
        - |
          pip install trafilatura && \
          hayhooks run --host 0.0.0.0
      volumeMounts:
        - name: local-data
          mountPath: /mnt/data
      env:
        - name: HAYHOOKS_PIPELINES_DIR
          value: /mnt/data
        - name: OPENAI_API_KEY
          valueFrom:
            secretKeyRef:
              name: openai-secret
              key: api-key
      resources:
        limits:
          memory: "512Mi"
          cpu: "500m"
        requests:
          memory: "256Mi"
          cpu: "250m"
  volumes:
    - name: local-data
      hostPath:
        path: /data
        type: Directory
Note that:
- We changed the Hayhooks container
commandto installtrafilauradependency before startup, since it's needed for our chat_with_website example pipeline. For a real production environment, we recommend creating a custom Hayhooks image as described here. - We make Hayhooks container read
OPENAI_API_KEYfrom a Kubernetes Secret.
Before applying this new configuration, create the openai-secret:
apiVersion: v1
kind: Secret
metadata:
  name: openai-secret
type: Opaque
data:
  # Replace the placeholder below with the base64 encoded value of your API key
  # Generate it using: echo -n $OPENAI_API_KEY | base64
  api-key: YOUR_BASE64_ENCODED_API_KEY_HERE
After applying this, check your Hayhooks Pod logs, and you'll see that the chat_with_website pipelines have already been deployed.
Roll Out Multiple Pods
Haystack pipelines are usually stateless, which is a perfect use case for distributing the requests to multiple pods running the same set of pipelines. Let's convert the single-Pod configuration to an actual Kubernetes Deployment:
apiVersion: apps/v1
kind: Deployment
metadata:
  name: haystack-deployment
spec:
  replicas: 3
  selector:
    matchLabels:
      app: haystack
  template:
    metadata:
      labels:
        app: haystack
    spec:
      initContainers:
        - name: install-dependencies
          image: python:3.12-slim
          workingDir: /mnt/data
          command: ["/bin/bash", "-c"]
          args:
            - |
              echo "Installing dependencies..."
              pip install trafilatura
              echo "Dependencies installed successfully!"
              touch /mnt/data/init-complete
          volumeMounts:
            - name: local-data
              mountPath: /mnt/data
          resources:
            requests:
              memory: "64Mi"
              cpu: "100m"
            limits:
              memory: "128Mi"
              cpu: "250m"
      containers:
        - image: deepset/hayhooks:v0.6.0
          name: hayhooks
          imagePullPolicy: IfNotPresent
          command: ["/bin/sh", "-c"]
          args:
            - |
              pip install trafilatura && \
              hayhooks run --host 0.0.0.0
          ports:
            - containerPort: 1416
              name: http
          volumeMounts:
            - name: local-data
              mountPath: /mnt/data
          env:
            - name: HAYHOOKS_PIPELINES_DIR
              value: /mnt/data
            - name: OPENAI_API_KEY
              valueFrom:
                secretKeyRef:
                  name: openai-secret
                  key: api-key
          resources:
            requests:
              memory: "256Mi"
              cpu: "250m"
            limits:
              memory: "512Mi"
              cpu: "500m"
      volumes:
        - name: local-data
          hostPath:
            path: /data
            type: Directory
Implementing the above configuration will create three pods. Each pod will run a different instance of Hayhooks, all serving the same example pipeline provided by the mounted volume in the previous example.
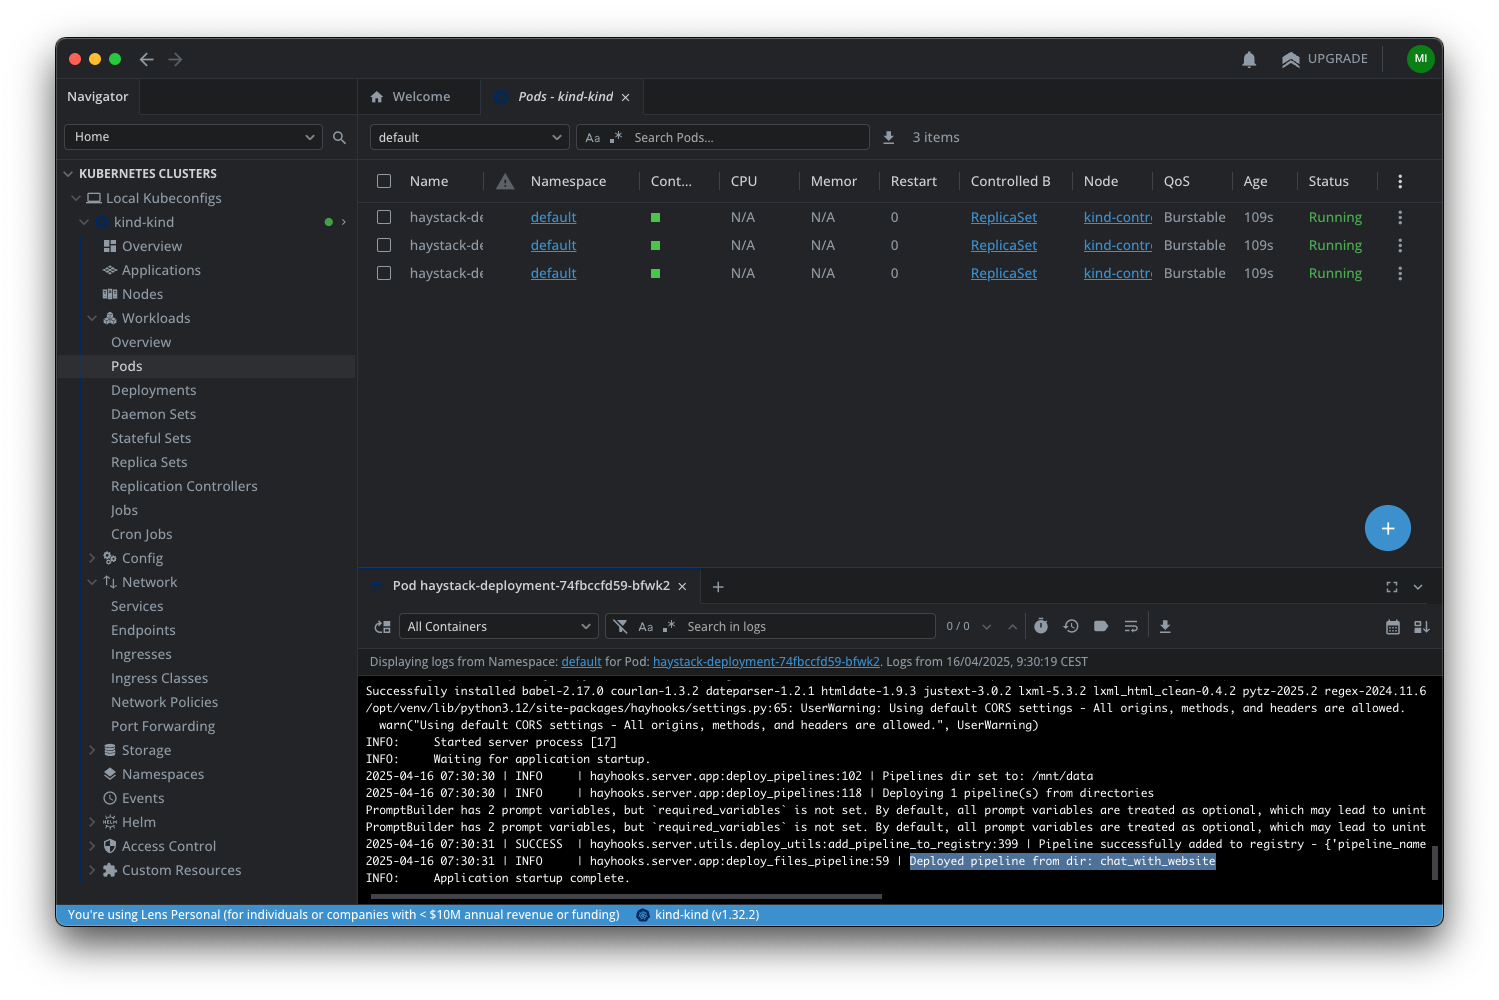
Note that the NodePort you created before will now act as a load balancer and will distribute incoming requests to the three Hayhooks Pods.